Authors : Abhishek Kumar Annamraju, Akashdeep Singh, Devprakash Satpathy, Charanjit Nayyar
Hello Friends,
I think its been almost 6-7 months since my last post came up. Well I will make sure that this doesn’t happen now. To state my research this semester, I will post some cool stuffs on image filtering techniques, advanced bio-medical Image processing techniques, implementation of neural networks with image processing, object detection, tracking, and 3D representation techniques and a touch-up of basic mosaicing techniques. Its a long way to go……………
Today its the time to brush up some basics. The main aim of this post is to introduce the basic image feature extraction tools. Tools!!!!!! , by tools I mean the simple old school algorithms which bring out the best from images and help the process of advanced image processing.
Lets start with understanding the meaning of image feature extraction, In machine learning, pattern recognition and in image processing, feature extraction starts from an initial set of measured data and builds derived values (features) intended to be informative, non redundant, facilitating the subsequent learning and generalization steps, in some cases leading to better human interpretations. In various computer visions, feature extraction applications widely used is the process of retrieving desired images from a large collection on the basis of features that can be automatically extracted from the images themselves. Feature extraction is related to dimensionality reduction:
1)It involves building derived values from the pool of data which is called as the information.
2)It is not non redundant set of data.
3)It is related to dimensionality reduction.
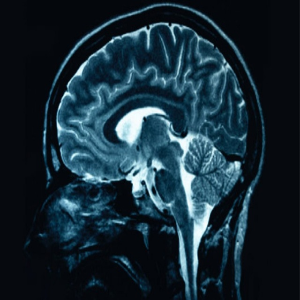
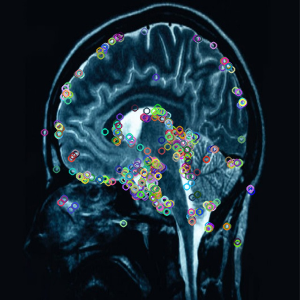
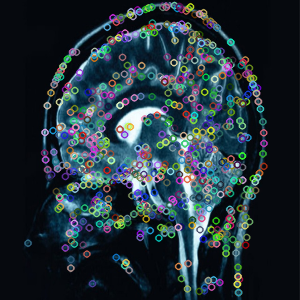
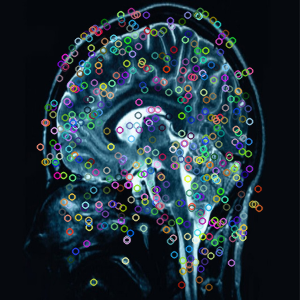
Here are some basic feature extraction codes and respective results and mind my words, I will be playing with your heads,or to put it simply extracting main features of your brain…confused???
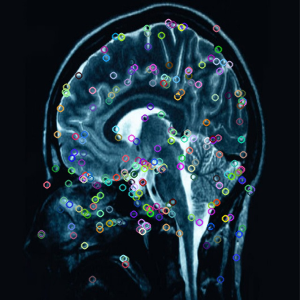
a)BRISK Features: Binary Robust invariant scalable keypoints. A comprehensive evaluation on benchmark datasets reveals BRISK’s adaptive, high quality performance as in state-of-the-art algorithms, albeit at a dramatically lower computational cost (an order of magnitude faster than SURF in cases). The key to speed lies in the application of a novel scale-space FAST-based detector in combination with the assembly of a bit-string descriptor from intensity comparisons retrieved by dedicated sampling of each keypoint neighborhood.
Here’s the research paper to BRISK :
https://drive.google.com/file/d/0B-_KU2rDr3aTdngxSDhRNzMzbzg/view?usp=sharing
Lets get to the code : https://drive.google.com/file/d/0B-_KU2rDr3aTT3JLdGFzM2x1ZEU/view?usp=sharing
Results:
I think now you got what I meant by extracting features off your brain!!!!!!!!!!!!!!!!!!!!
Here in the code you will find two main things, one is a constructor while other is the respective operator,
BRISK brisk(30, 3, 1.0f);
brisk(image, Mat(), keypoints, result, false );
BRISK brisk(int thresh, int octaves, float patternScale);
Application based analysis of Parameters:
1) Thresh – Greater the values, lesser are the features detected, that doesn’t mean you will keep it to 0, because in that case the features detected may be redundant.
2) Octaves: Value varies from 0 to 8, greater the values, more the image will be scaled to extract the features
3) PatternScale: Lesser the value more the features as well as redundancies.
b) Fast Features : Features from Accelerated Segment Test. The algorithm operates in two stages 2 : in the first step, a segment of the test based on the relative brightness is applied to each pixel of the processed image; the second stage refines and limit the results by the method of non-maximum suppression. As the non maximal suppression is only performed to a small
subset of image points, which passed the first segment test, the processing time remains short.
FAST.pdf : https://drive.google.com/file/d/0B-_KU2rDr3aTLV9ndlJidHRBUmM/view?usp=sharing
Lets get to the code : https://drive.google.com/file/d/0B-_KU2rDr3aTLVpwSFNjSi1RaEE/view?usp=sharing
In the code you will find this segment
FASTX(InputArray image, vector<KeyPoint>& keypoints, int threshold, bool nonmaxSuppression, int type);
Application based analysis of Parameters:
1) Threshold: Lesser the value more the features as well as redundancies.
2) nonmaxSuppression: Non-maximum supression is often used along with edge detection algorithms. The image is scanned along the image gradient direction, and if pixels are not part of the local maxima they are set to zero. This has the effect of suppressing all image information that is not part of local maxima. when true, the algorithm is applied.
3) Type: FastFeatureDetector::TYPE_a_b : For every feature point with respect to “a” neighbour pixels, store the “b” pixels around it as a vector.
c)Harris Corner Detector: Harris corner detector is based on the local autocorrelation function of a signal which measures the local changes of the signal with patches shifted by a small amount in different directions.
Harris Corner.pdf : https://drive.google.com/file/d/0B-_KU2rDr3aTYjhOeVpCeWtWQ0k/view?usp=sharing
Code: https://drive.google.com/file/d/0B-_KU2rDr3aTelFLVkZ3dzk4UDg/view?usp=sharing
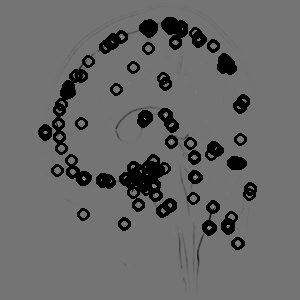
Results :
cornerHarris( image_gray, dst, blockSize, apertureSize, k, BORDER_DEFAULT );
Application based analysis of Parameters:
1) blockSize: More the size, more is the blurring and lesser are the detected corners
apertureSize: Its the kernel size, greater the value, greater is filtering of detected corners
2) k: greater the value, greater the edges are preserved and lesser are the corners detected
d) ORB Features : Oriented BRIEF Features. RB (Oriented FAST and Rotated BRIEF) is a fast robust local feature detector, first presented by Ethan Rublee et al. in 2011, that can be used in computer vision tasks like object recognition or 3D reconstruction. It is based on the visual descriptor BRIEF (Binary Robust Independent Elementary Features) and the FAST keypoint detector. Its aim is to provide a fast and efficient alternative to SIFT.
ORB.pdf : https://drive.google.com/file/d/0B-_KU2rDr3aTeC1UUkNBNlhoRFU/view?usp=sharing
Code : https://drive.google.com/file/d/0B-_KU2rDr3aTbWVhZEtpY1dqeWc/view?usp=sharing
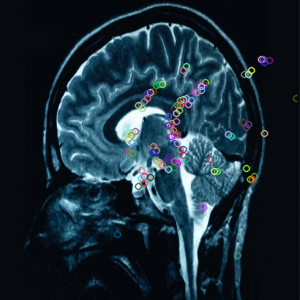
Results :
Here again, in the code you will find two main things, one is a constructor while other is the respective operator,
ORB orb(500, 1.2f, 8, 31, 0, 2, ORB::HARRIS_SCORE, 31);
	orb(image, Mat(), keypoints, result, false );
ORB(int nfeatures, float scaleFactor, int nlevels, int edgeThreshold, int firstLevel, int WTA_K, int scoreType=ORB::HARRIS_SCORE, int patchSize);
Application based analysis of Parameters:
1) nfeatures: Indicates maximum number of features to be detected
scaleFactor: Pyramid decimation ratio, greater than 1. scaleFactor==2 means the classical pyramid, where each next level has 4x less pixels than the previous, but such a big scale factor will degrade feature matching scores dramatically. On the other hand, too close to 1 scale factor will mean that to cover certain scale range you will need more pyramid levels and so the speed will suffer (as per OPENCV WEBSITE).
2) nlevels: The number of pyramid levels. The smallest level will have linear size equal to input_image_linear_size/pow(scaleFactor, nlevels)
3) edgeThreshold: greater the value, lesser are the feature points
4) WTA_K : The number of points that produce each element of the oriented BRIEF descriptor. The default value 2 means the BRIEF where we take a random point pair and compare their brightnesses, so we get 0/1 response. Other possible values are 3 and 4. For example, 3 means that we take 3 random points (of course, those point coordinates are random, but they are generated from the pre-defined seed, so each element of BRIEF descriptor is computed deterministically from the pixel rectangle), find point of maximum brightness and output index of the winner (0, 1 or 2). Such output will occupy 2 bits, and therefore it will need a special variant of Hamming distance, denoted as NORM_HAMMING2 (2 bits per bin). When WTA_K=4, we take 4 random points to compute each bin (that will also occupy 2 bits with possible values 0, 1, 2 or 3) (as per OPENCV WEBSITE).
e) Shi Tomasi Corner Detector : We have come up with this earlier, http://abhishek4273.com/2014/07/20/motion-tracking-using-opencv/
f) SIFT Features: Scale Invarient Feature Transform. SIFT keypoints of objects are first extracted from a set of reference images[1] and stored in a database. An object is recognized in a new image by individually comparing each feature from the new image to this database and finding candidate matching features based on Euclidean distance of their feature vectors. From the full set of matches, subsets of keypoints that agree on the object and its location, scale, and orientation in the new image are identified to filter out good matches. The determination of consistent clusters is performed rapidly by using an efficient hash table implementation of the generalized Hough transform. Each cluster of 3 or more features that agree on an object and its pose is then subject to further detailed model verification and subsequently outliers are discarded. Finally the probability that a particular set of features indicates the presence of an object is computed, given the accuracy of fit and number of probable false matches. Object matches that pass all these tests can be identified as correct with high confidence.
sift1.pdf : https://drive.google.com/file/d/0B-_KU2rDr3aTTWk3M2xJVnU4SkE/view?usp=sharing
sift2.pdf : https://drive.google.com/file/d/0B-_KU2rDr3aTbDlZQkcycXNzdmc/view?usp=sharing
code: https://drive.google.com/file/d/0B-_KU2rDr3aTWThQdTJiWktDaUk/view?usp=sharing
Results :
g) SURF Features : Speeded Up Robust Features. SURF is a detector and a high-performance descriptor points of interest in an image where the image is transformed into coordinates, using a technique called multi-resolution. Is to make a copy of the original image with Pyramidal Gaussian or Laplacian Pyramid shape and obtain image with the same size but with reduced bandwidth. Thus a special blurring effect on the original image, called Scale-Space is achieved. This technique ensures that the points of interest are scale invariant. The SURF algorithm is based on the SIFT predecessor.
surf.pdf: https://drive.google.com/file/d/0B-_KU2rDr3aTMDhvanl0TlhLVEU/view?usp=sharing
code : https://drive.google.com/file/d/0B-_KU2rDr3aTNWVDNU10aGJjQTA/view?usp=sharing
Results :
So this is it from my side with respect to basic feature detection. Keep looking forward for my posts.
Thank you guys!!!!
Adios Amigos!!!!!!!
